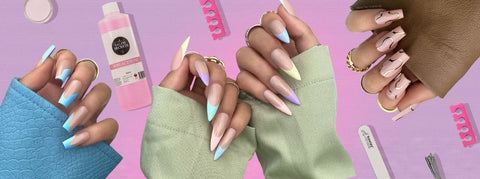
In an ideal world, we would all have strong nails with minimal maintenance. This is a nice thought, but the truth is not everyone knows how to care for them properly. The easiest way to fix weak nails is to treat them with nourishing products and leave them alone occasionally. If this is easier said than done, we can help you understand why your nails don’t like certain behaviours and how to get the most from a manicure.
It is time for information about how to create the healthiest and best-looking nails!
How to Strengthen Weak Nails: Stronger &Thicker
Brittle nails can be a problem — they are unattractive and can signify a hidden lack of nutrients. By paying attention to the condition of your nails, you can get insights into your overall health. Although most thin nail problems are easy to fix, you must keep in mind the results are not quick and may need your persistence.
Here is what you can do to strengthen nails visibly:
Take A Biotin Supplement
Biotin or vitamin B7 is an essential nutrient belonging to the B-complex. This is necessary for healthy skin, nails and hair. These types of vitamins are easy to deplete due to stress, and you can expect brittleness if you expose yourself to mechanical, environmental and chemical factors.
Biotin supplements can help keep your nails resistant to external influences. As a bonus, you also improve the health of your hair and skin. There are also several other ways to strengthen weak nails too, and we will outline a comprehensive list below.
Don’t Soak Your Hands In Water
Whenever possible, you should limit exposure to water as hard minerals can make nails flaky and prevent growth. If you need to work with water, always wear rubber gloves. If you are exposed to water professionally, make sure you wear extra strong protective gloves.
Drink Water
Staying hydrated is important for your body, mind and nails! If you forget to drink the recommended eight glasses per day, simplify your hydration routine by drinking one big glass in the morning and one half an hour before every meal. Other tips are leaving a jug on your workstation or taking a bottle in your bag.
Watch Your Diet
A wholesome diet rich in a variety of nutrients will do wonders for your nails. If you miss any of the following essentials, you can see the early signs of poor nail health pretty quickly:
- Organ meats, dairy, egg yolk and salmon.
- Leafy green vegetables.
- Avocado, citrus fruits, strawberries and kiwi.
- Sweet potato.
- Nuts and seeds – quinoa, almonds, pecans, chia seeds, flax seeds, and cashews.
- Soy, lentils, edamame beans, chickpeas and peanuts.
Food supplements can help, but the best resource of all is real food. As long as you eat well most of the time, your nails will reward you with strength and shine.
Be Selective With The Nail Supplies
So much effort in the diet area can go to waste if you make a poor choice with nail products. This goes double for your basic nail care routine that you use daily, as well as with the salon nail treatments. Ask your nail technician about the quality of the professional nail supplies—they should be able to provide vital information.
For example, using a quality gel base with calcium and Vitamin E helps the nail bed grow thicker. If you have to use nail glue, choose one with strong adhesive powers to minimise quantity and application time.
Reduce Gel Or Acrylic Nail Reapplication When Possible
Gel and acrylic nails are stunning, but they require multiple chemical saturations to bring them to perfect condition. Either choose long-lasting acrylic nails or avoid using them at all for a while.
Pause From Nail Polish
Out of all the tips we shared here, this may be the most difficult to follow. There are so many fabulous nail polish colours out there that it is hard to remain neutral. At least go for a non-acetone polish remover to limit additional damage to already brittle nails.
Keep Your Nails Short & Oval-Shaped
Short nails are classy and easy to maintain. If you go for stiletto nails, they are more likely to break. Oval, almond-shaped and rectangle nails last longer. It is also important how you clip your nails. Sharp tools will cut a straight line and maintain shape with a little buffering. Replace your clippers often to keep them in top-notch condition.
Apply Oil Treatments On Hands & Nails
Do you know the feeling after professional manicures when nourishing nail supplies are available, including a peeling cream, careful filing and cuticle vitamin oils? Well, you cannot replicate the exact professional nail treatment at home. Still, you can keep a hydrating hand and nail treatment on your desk and use it several times a day.
Carry A Nail File In Your Bag
Nails suffer small injuries throughout the day, such as scratching against uneven surfaces and the use of chemicals. To smooth out those micro-injuries before they turn into more serious damage, keep buffers on hand. Keep in mind there are different files and buffers for natural nails and acrylic nails. Therefore, check what you are buying before you start. Medium files (180 grit) are good for shaping fingernails. Finer files (>240 grit) are excellent for those minor nail traumas.
Insist On Professional Nail Supplies
When your nail health is questionable, visit salons that invest in wholesale supplies of the highest quality. It doesn’t hurt to check out the products and look for quality brands like Hawley. Ensure that your nail technician:
- Maintains a sanitary environment.
- Provides proper salon ventilation.
- Has a passion for beautiful nails.
- Is interested in continuous education about nail trends.
- Delivers excellent customer service by giving answers to your questions.
The No-Nonsense Guide To Doing A Manicure At Home
Doing manicures at home is something many have tried at one point or another. Depending on how skilled you are and how long you wait for your next appointment, you may have reached out for the file and decided to do your nails yourself. However, being left without professional help can seem daunting.
We are happy to report incredible manicures can be completed at home without too much fuss.
How To Do Manicure At Home Without Tools
What do you need to create home manicures? Well, the "without tools" part is only partially true. You will undoubtedly need some tools, which should be in your basic beauty and care kit. We don't think you need a professional manicure table, but you must have a solid flat surface with appropriate height and light so that you have a clear view while avoiding back and neck pain.
A professional nail kit can help a lot if you are willing to spend a bit more. Now might be an excellent time to get yourself one as many are discounted. If you are not a fan of investing in a home manicure kit, you should at least have these essential items on hand:
- Nail polish remover (acetone or non-acetone) you can use on natural, gel and acrylic nails.
- Cotton balls to remove the nail polish.
- Bowl for soaking fingers to soften the skin.
- Nail clippers to cut grown nails.
- Files for nails to shape the nail in the desired shape - oval, rectangular, almond, rounded, or mountain peak.
- Cuticle stick to gently push the cuticles back to your roots.
- Hand cream as a skin and nail moisturiser to wrap up the manicure.
- Buffers for your nails to buff and shine.
- Almond, walnut or olive oil can be used as an alternative to cuticle oil.
- Warm milk will soften the cuticles and the nails.
Assuming you have all of this, you won't have too much trouble in completing your first at-home manicure procedure. Now, what steps do you need to take to do it properly?
Lifesaving Home Manicure Tips
The first step would be to remove any old polish. If you use acetone nail polish remover and notice your nails getting dark and brittle, the acetone can be the reason. In that case, switch to non-acetone options.
If you have acrylic or gel nails, removing the polish will not be as simple. Additionally, non-acetone removers may not be as effective. First, you will need to remove the nails or the nail base.
Acrylic & Gel Nails
To remove acrylic nails, first clip off the excess nail length and buff the ends. Pour acetone remover into the bowl and soak your nails for 5 minutes. The next step is pulling back any nail polish with a cuticle remover and using your buffer to remove the rest. You might need to do a second round of soaking to dissolve the nails completely.
Expert technicians will wrap gel nails in cotton balls soaked well in acetone and then wrap them in aluminium foil. They do this so it is easier to scrap the polish. Do the same with gel polish at home. All that soaking, pulling and scrapping will somewhat damage the nails. Take your nail buffer to buff and polish the nails and apply cuticle oil immediately to restore hydration.
DIY Manicure For Natural Nails
We all love professionally done nails, but they do need to take a breather occasionally. This will grow your natural nails and provide that oh-so-needed restoration time. You will still need to clip, buff and nourish them. Before you spruce them up, you need to do the prep legwork.
Step #1: Soak cotton balls in non-acetone polish remover and gently press against the nail to let the chemical do the job. There is no need to rub off the polish harshly.
Step #2: Fill the bowl with warm milk or make a solution of ½ warm milk and ½ water. Soak your fingers for 5-10 minutes.
Step #3: Push the cuticles back by using the wooden or metal cuticle stick. Wooden sticks are gentle to the skin and disposable so they are suitable for salons. For a manicure at home, you can rely on one metal cuticle remover.
Step #4: You can polish nails with a buffer to eliminate coarse ends and shape rounded, squoval or oval edges. Don't experiment with more complicated shapes. It's better to leave them for when you visit your nail salon. Pay attention to the nail surface if you are going nail-polish-free.
Step #5: Apply cuticle oil. Make sure you let it penetrate the nail and the surrounding skin for a while.
Step #7: Moisturise the hands and nails. Use a mask or a cream. If you have time to spare, leave it for 15 minutes. Remove the excess with paper tissues. Be thorough if you apply polish afterwards. You can use a mixture of soap and warm water to quickly dip in the nails and remove extra oils from the moisturiser.
Finally, applying nail polish is the last and most rewarding step of the home manicure. Hold your hands out and admire the results of your efforts. In the end, your hands may not look like being done by a nail tech. However, it is a hundred times better to engage in this act of self-care even if it is not perfect than leaving your nails to grow and deform in unwanted ways.
Congrats on doing your nearly-expert at-home manicure!
How To Remove Gel Nail Polish At Home
Everyone loves getting their nails done, especially when there is a special occasion coming up. It is easy to get addicted to the fresh smell of the polish and the glossy sheen of the varnish. The pampering of getting a manicure is certainly a real treat.
However, gel polish often starts to lift after weeks of wear, and it's easy to start peeling away. Peeling the gel lacquer is not only quite unattractive, but it is also one of the most detrimental acts you can do to your nails. Your nails are composed of tiny cells called keratinocytes, which are delicate cells that help stimulate growth. By peeling your polish, you are also ripping off helpful cells too. This harms the strength, texture, colour and regularity of your nail.
Thankfully, there are several ways you can remove gel polish without destroying your nails.
What You Will Need To Remove Gel Nail Polish
Do not fret. Here is a list of materials you will need to remove gel nail polish safely.
You will need:
- Pure acetone
- An orange stick/ cuticle pusher
- Aluminium foil
- Scissors
- A nail file/emery board
- Cotton wool
- Cuticle oil
- Hand cream
- Nail strengthening polish
There are two things you will need to prepare before starting the gel polish removal process. Begin by cutting your aluminium foil into rectangles about eight to nine centimetres long and about five centimetres wide. There should be 10 pieces of these.
The second step during preparation is ripping and pulling cotton wool into small balls that will fit onto your nail bed, once again 10 pieces. Now let’s begin.
How To Remove Gel Nail Polish – 10 Easy Steps
- Start by taking your nail file/emery board and roughly file at your existing gel fingernails. Don’t forget to do the sides, and file them until the original colour becomes chalky. Keep in mind this part does not have to be perfect.
- The next step is taking your pure acetone and dousing your cotton ball.
- Your acetone-saturated ball should feel wet but not drippy. Place this ball on your filed nail bed.
- Now take your foil rectangle and place it on a flat surface. Place your finger with the acetone cotton ball in the centre of the rectangular foil. Take one side of the foil and wrap it over the fingernail. Take the other side of the foil and wrap it towards the opposite side and then you should be left with a flap from where your fingertip is. Move that flap towards you. Repeat this step for all your fingernails. You may need to seek help from a friend or family member for your second hand.
- Wait for the acetone to react to the gel polish for about five to ten minutes.
- Unwrap all your foiled fingers. As you do this, you will see the gel polish has started to deteriorate. Take your orange stick or cuticle pusher and scrap away the lifting gel polish in a chiselling motion. If your gel polish is still not coming off after you have scraped it, just repeat steps 1 to 5 again but leave the solution on for longer.
- Once all your nails are bare, push your cuticles back into place with an orange stick. The next step is rubbing some cuticle oil onto the nail bed and the surrounding skin as the oil will help the regenerating cells stick together.
- After letting your cuticles absorb the oil, take a nail-strengthening polish and paint over your nails to ensure they grow and stay strong.
- The final step is using hand cream and massaging this around your hands.
- Hold up your hands and admire the finished look.
How To Remove Gel Nail Polish – Other Aftercare Tips
Did you know manicures can stimulate blood flow in the hands and assist with nail growth? If you don’t have the time or the money to frequent the salon, then here are some products you can invest in that you can take home to DIY:
Step #1: Hawley Illume Hydrofresh-Advanced Nail Dehydrator Twist & Lock
Hawley Illume Hydrofresh is a nail cleanser and dehydrator in one, which dramatically improves adhesion. It is a hydrophobically balanced solution that, defats, dehydrates, purifies and combats the risk of cross-contamination and will brighten up your nails in no time!
Step #2: Hawley Illume Activate 3 In 1 Exfoliator
Hawley Illume Activate 3 In 1 Exfoliator has a unique foaming formula that softens, conditions and erases. This can be used in all nail services like gel, manicure and pedicure.
The key to this product is the foaming action. Use a small drop on the nail plate close to the cuticle area, then use the Activate brush in small circular movements to agitate and produce foam. This works the product into the eponychium, true cuticle and nail plate. It penetrates deeply into the skin and nail plate by providing moisture where needed and exfoliation in those tough areas.
Step #3: Natural Look Hand & Nail Treatment Cream
Natural Look Hand and Nail Treatment Cream is a high-performance hand cream made with creatine, sunflower oil, vitamin C and a U.V. filter. These will moisturise, soothe, revitalise skin cell energy, reduce the appearance of fine lines and protect from premature ageing. Use daily to help firm, tone and brighten the skin for youthful-looking hands and healthier nails.
Step 4: Kiara Sky Nourish Oil
Kiara Sky Nourish Oil is perfect for winter when cuticles start to dry out. Use as a cuticle oil to hydrate and replenish with ease.
Conclusion
There you have it! You can strengthen your nails and do your own manicure at home. Although I'm sure we all like being spoiled and visiting a professional salon now and then.


Comments (0)
There are no comments for this article. Be the first one to leave a message!